v
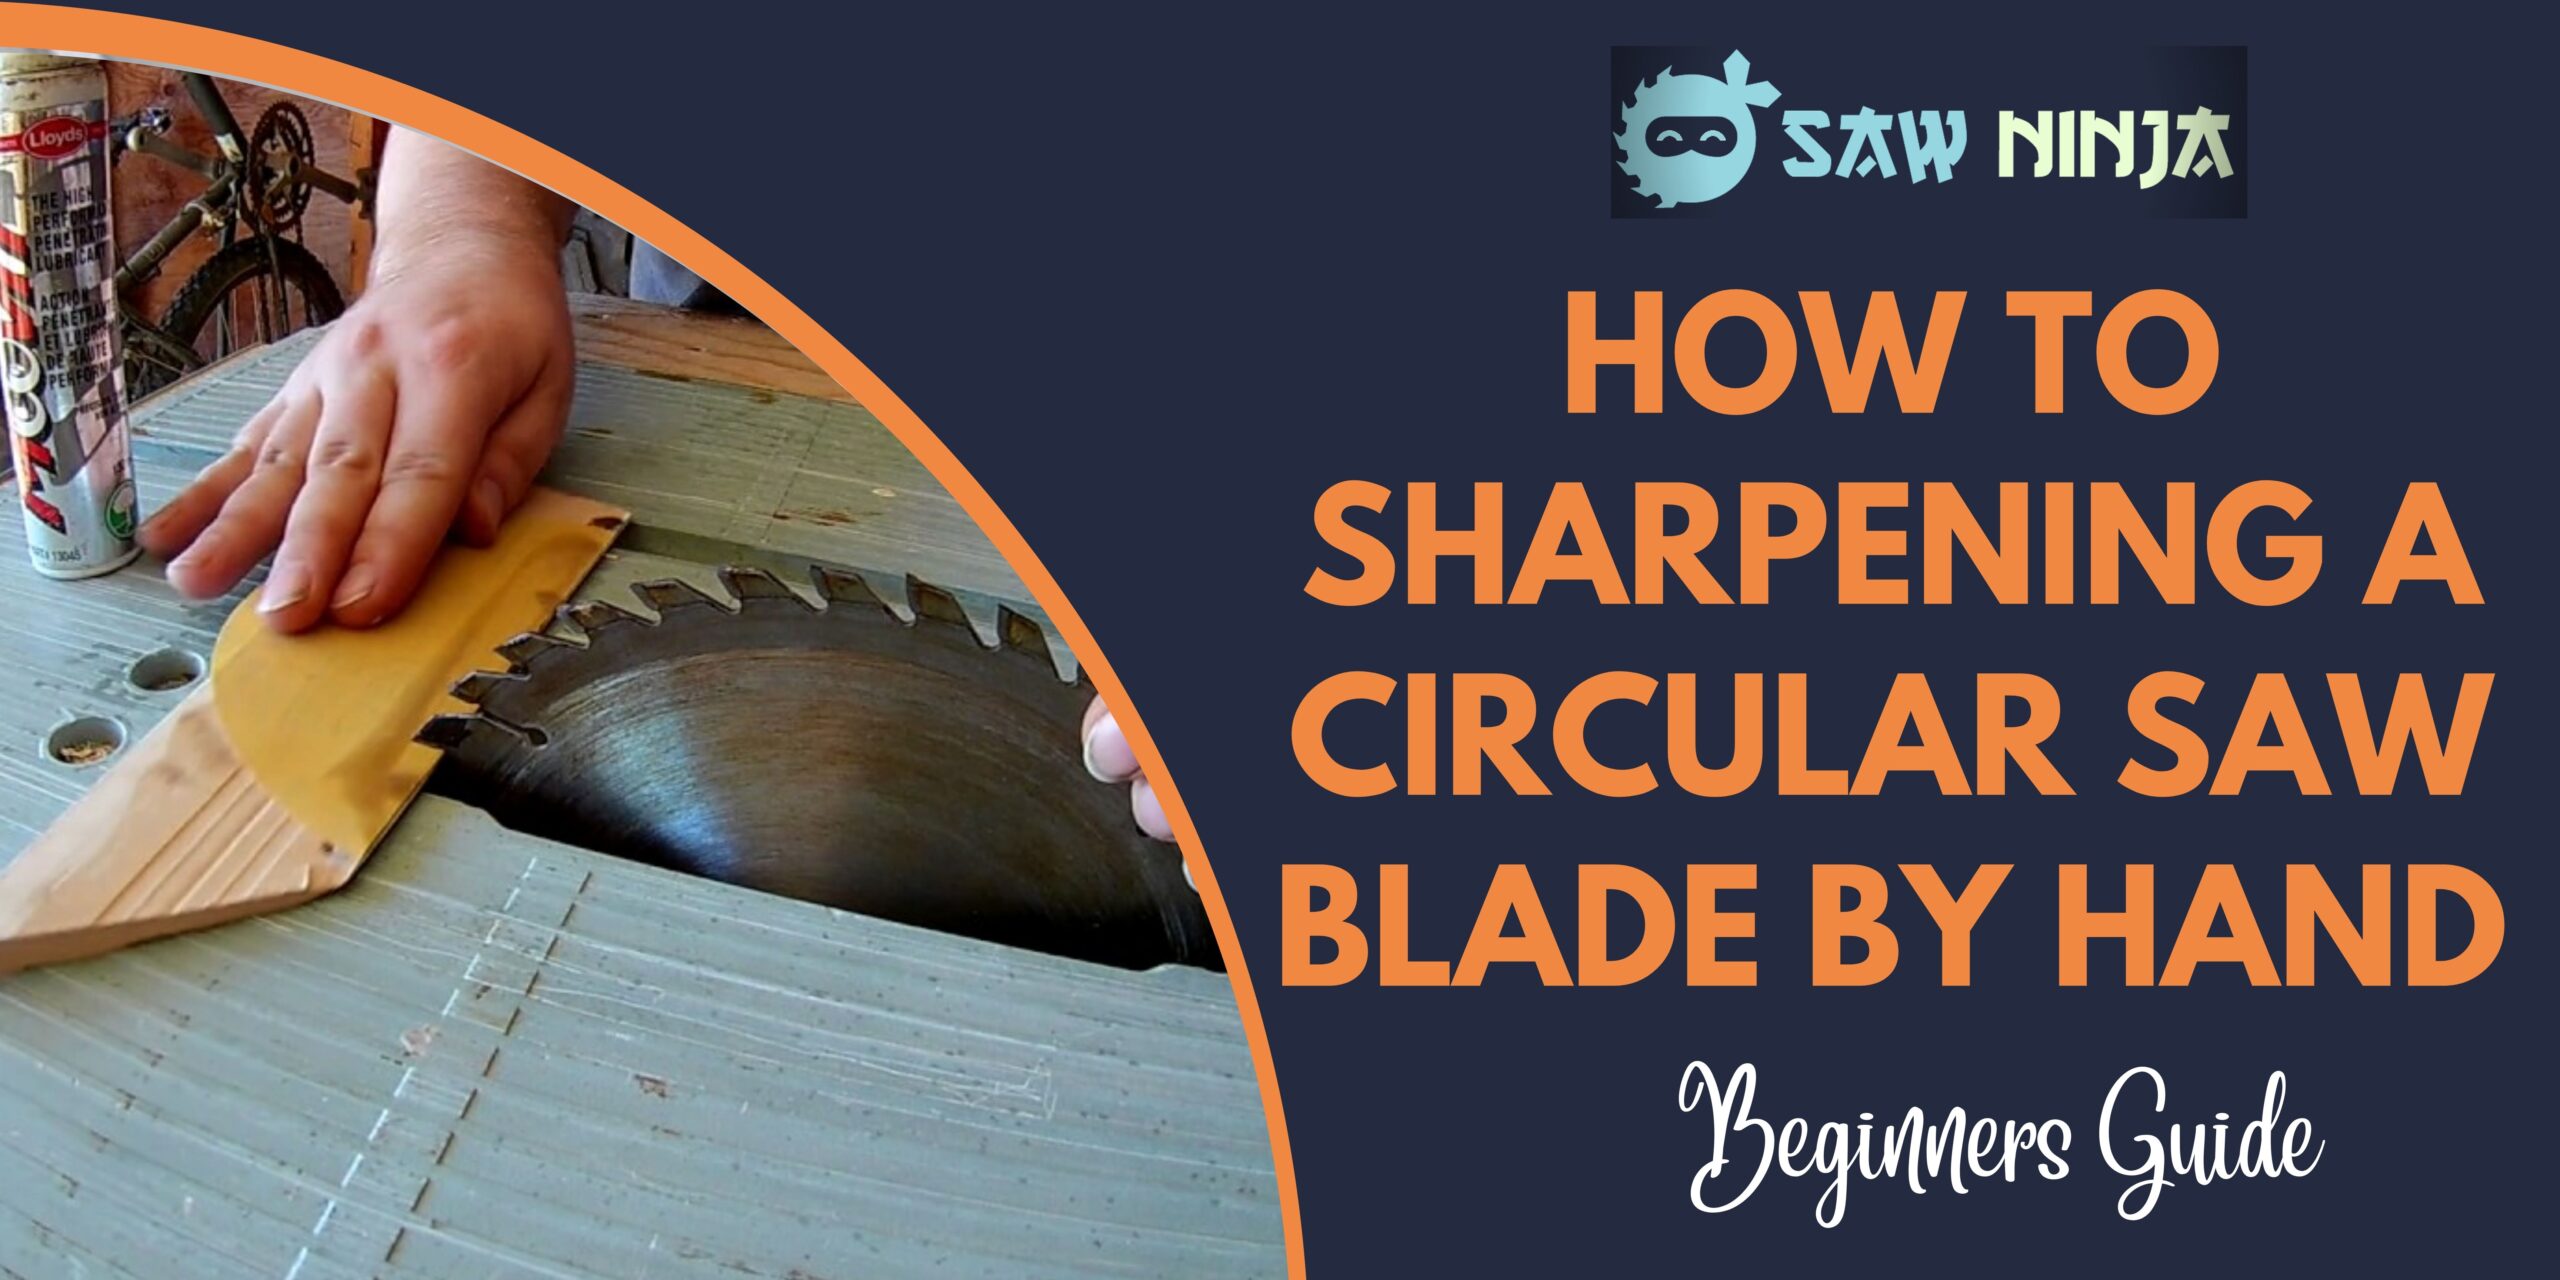
How to Sharpening a circular Saw Blade By Hand

How to Sharpening a circular Saw Blade By Hand

A hand saw is a basic type of saw that is still in use today. It has a long, thin blade that is designed to cut through material by pulling the blade towards the user. A circular saw, on the other hand, is a more advanced type of saw that uses a rotating blade to cut through material. Circular saws are ideal for larger projects, while hand saws can be used for smaller projects or detailed work. Which one should you use? Let’s find out.

If you’re working with wood, you’ll need to sharpen your saw blades frequently. Sharpening by hand is a bit of a process , but it’s not difficult once you get the hang of it. You’ll need a file, a clamp, and a few other tools to get started.

Things you will need :

-File

-Clamp

-Protective gloves

-Safety goggles

-Marking pen or pencil

Step by Step Guide How to Sharpening a circular Saw Blade By Hand

  1. Unplug the saw and remove the blade. Make sure the saw is unplugged before you begin any work on it.
  2. Clamp the blade in a vise. This will hold the blade steady while you work on it.
  3. Put on your protective gloves and safety goggles.
  4. Use a file to sharpen the teeth on the blade. Start with a coarse file and then move to a finer file.
  5. Draw a line on the blade to indicate where you’ve sharpened it. This will help you keep track of your progress.
  6. Repeat steps 4 and 5 until all the teeth on the blade are sharpened.
  7. Reattach the blade to the saw and test it out. Make sure the saw is unplugged before you do this.

And that’s it! Sharpening a circular saw blade by hand is a relatively easy process. Just be sure to take all the necessary safety precautions and you’ll be good to go.

Through,  above steps you can easily sharpen your circular saw blade by hand. But it is time-consuming. So, if you want a fast and easy way to sharpen your circular saw blade, you can use a sharpening stone.

Tips :

-Be sure to unplug your saw before beginning any work on the blade.

-Wear safety goggles and gloves to protect yourself from the blade.

-Work slowly and carefully to avoid accidents.

-If your blade is severely damaged, it’s best to replace it.

-Keep your work area clean and free of debris.

-Sharpen your blade regularly to keep it in good condition.

 Precautions:

-Never use a damaged or dull blade. This can cause kickback and serious injury.

-Be very careful when sharpening the blade. The teeth are extremely sharp and can cause serious injury.

-Wear safety goggles and gloves to protect yourself from the blade.

-Work slowly and carefully to avoid accidents.

-Keep your work area clean and free of debris.

If you’re using a circular saw regularly, it’s important to keep the blade sharp. A dull blade can cause kickback and make it more difficult to cut through materials. While you can buy a blade sharpener, it’s just as easy sharp blade by hand.

FAQs

Q:How to Sharpen a Circular Saw Blade by Hand?

A:There are two ways that you can sharpen your circular saw blade by hand. The first way is to use a file, and the second way is to use a rotary tool.

Q: Which is the better way to sharpen a circular saw blade by hand, a file or a rotary tool?

A:There is no definitive answer to this question. It really depends on your personal preference and what type of results you are looking for.

Q: What are the benefits of sharpening my own circular saw blade?

A:There are several benefits to sharpening your own circular saw blade. First, it can save you money. Second, it can be a great way to extend the life of your saw blade. Third, it can help you get better results when cutting.

Q: What are the risks of sharpening my own circular saw blade?

A:There are some risks associated with sharpening your own circular saw blade. First, if you are not careful, you can damage the teeth on your saw blade. Second, if you do not use the proper technique, you can create a dangerous situation where the saw blade could kick back and injure you.

Conclusion:

Sharpening your own circular saw blade can be a great way to save money and extend the life of your saw blade. However, there are some risks associated with this process. Be sure to use the proper technique and be very careful when sharpening your saw blade.

So, there you have it! A few things to keep in mind when sharpening your own circular saw blade by hand. Be sure to use the proper technique, be very careful, and if you have any questions, consult with a professional before beginning. Thanks for reading!

>>>>

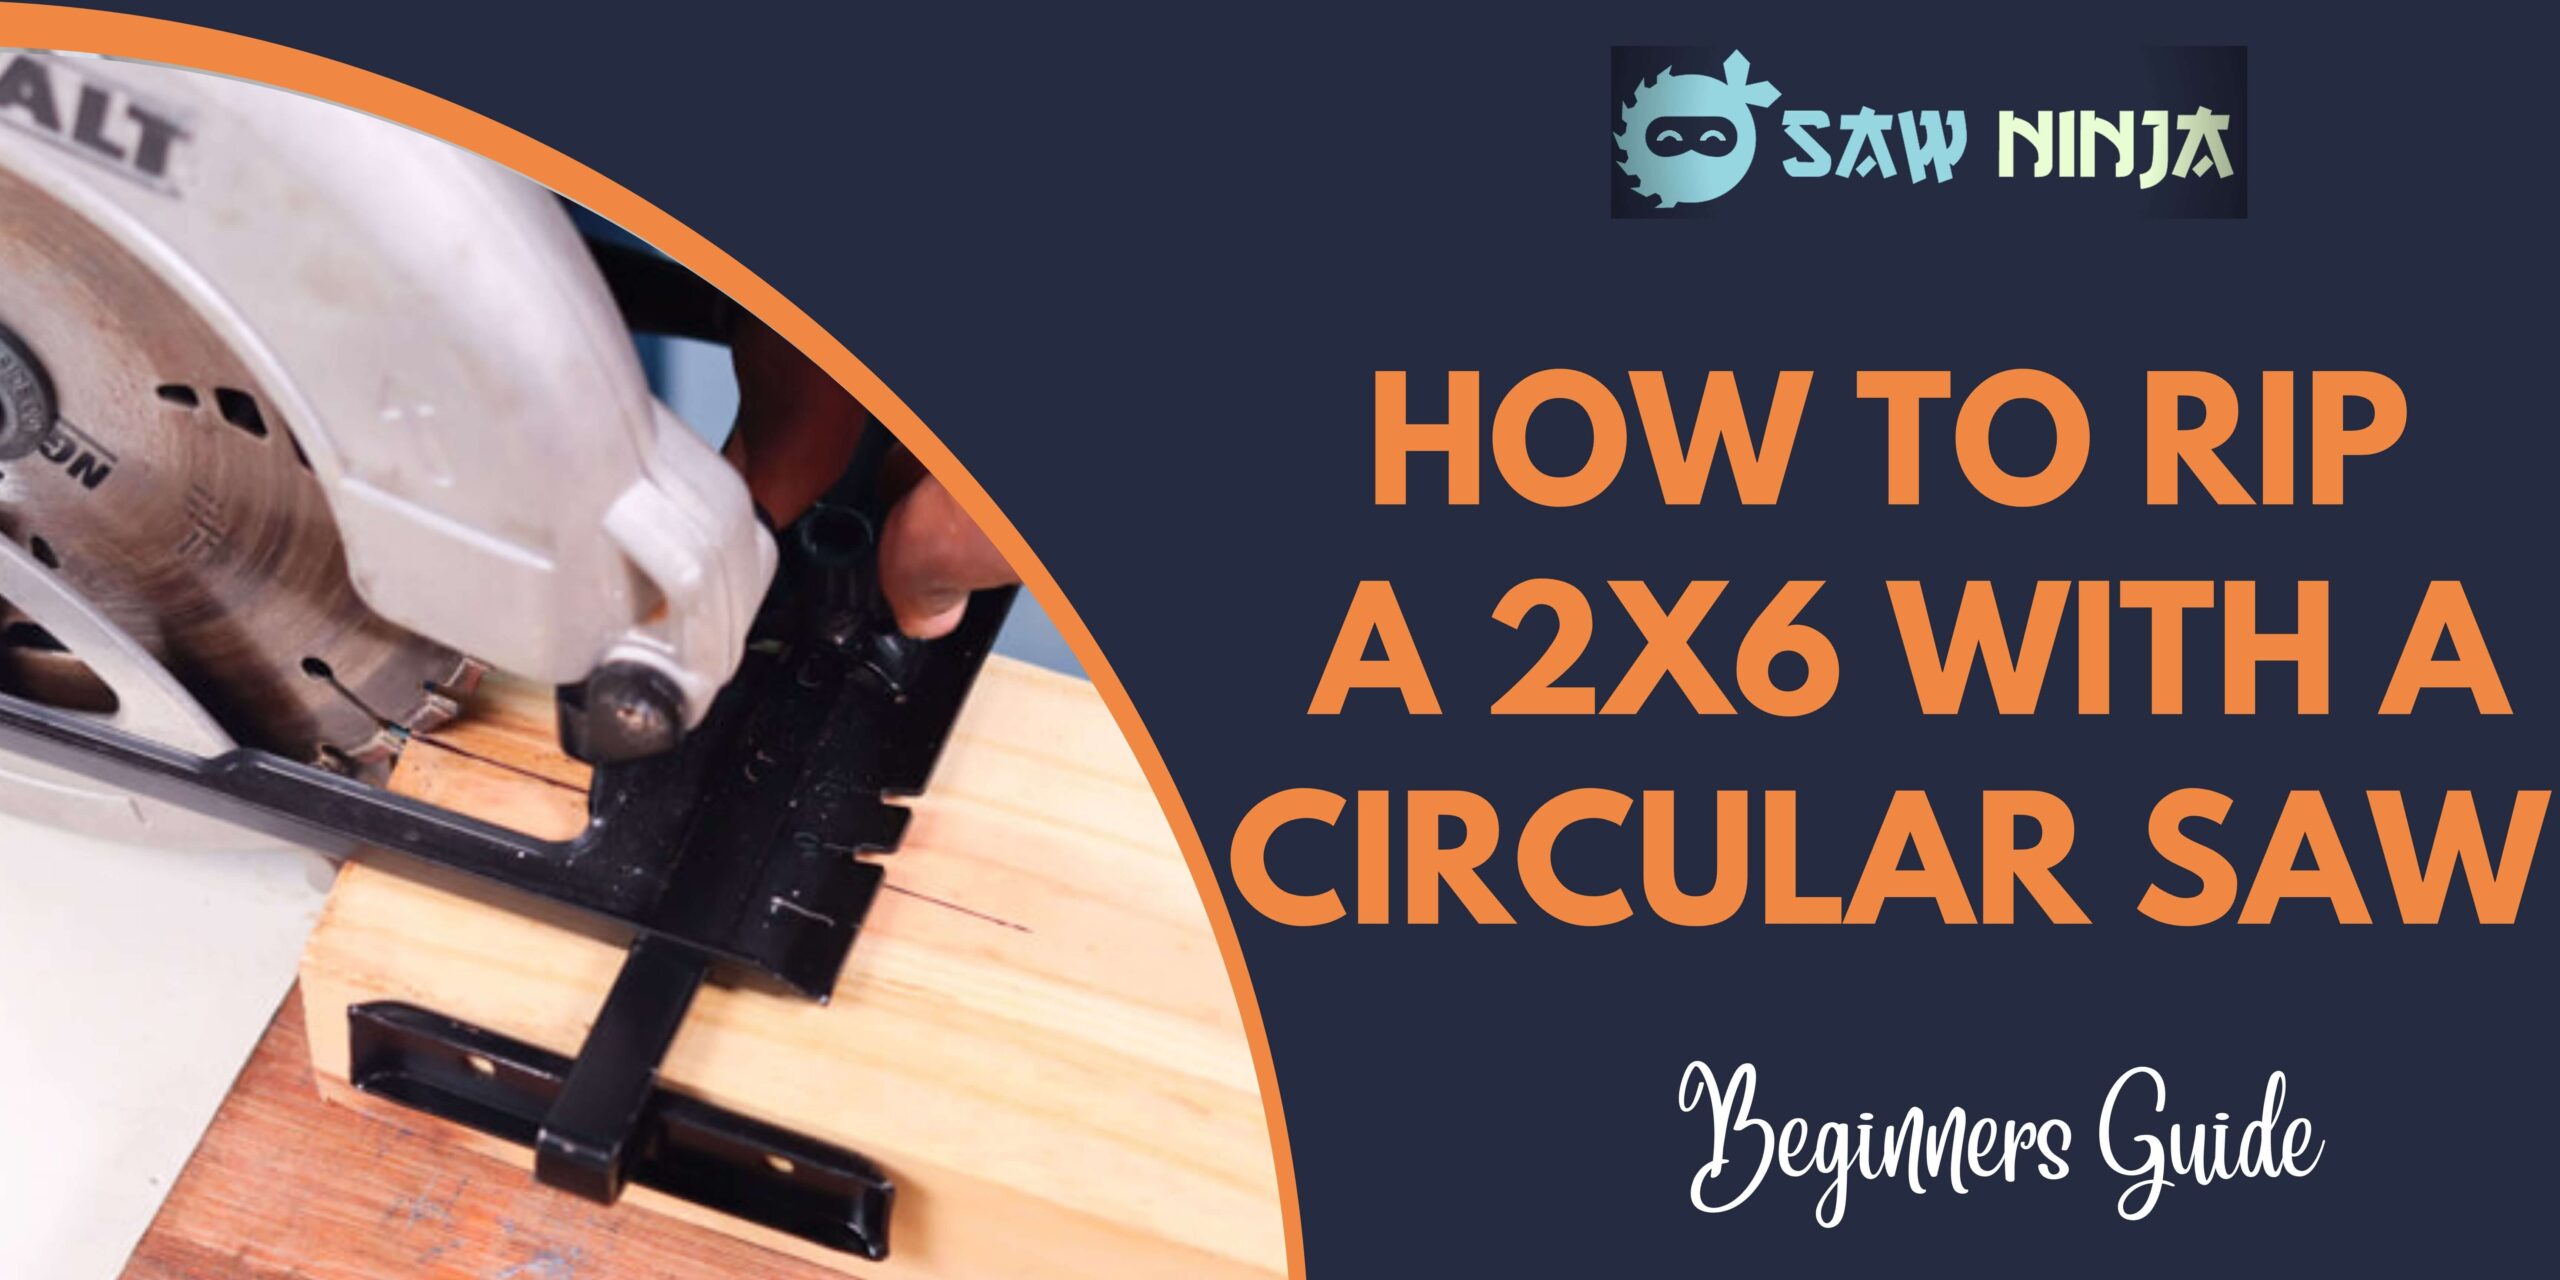
How to Rip a 2x6 With a Circular Saw

How to Rip a 2×6 With a Circular Saw

Circular saws are one of the most popular and versatile types of saws available. They can be used for a variety of applications, but many people don’t know how to use them properly. In this blog post, we will show you how to rip a 2×6 with a circular saw. We will also provide some tips on how to make the process easier and more accurate. Stay safe and enjoy your new circular saw skills!

>>>> Best Circular Saw Blade for Laminate Flooring

You may also want to check out our blog post on How to Cut a 2×4 With a Circular Saw – it’s just as informative (and perhaps even more so).

There are a few ways that you can rip a 2×6 with a circular saw, but the easiest and most effective way is to use a rip fence.

Things we will need:

-Circular saw

-Tape measure

-Speed square

-Pencil

-Wood glue

-Cordless drill

-1 inch hole saw

-Rags

-Staple gun

-Safety goggles

-Ear protection

Step by Step Guide:

  1. Measure and mark the wood.
  2. Cut the wood with a circular saw.
  3. Make sure the cuts are straight by using a speed square.
  4. Apply wood glue to the edges of the wood.
  5. Join the pieces of wood together.
  6. Use a cordless drill to make a hole in the wood.
  7. Use a 1 inch hole saw to make a hole in the wood.
  8. Apply a finish to the wood.
  9. Attach the wood to a surface using a staple gun.
  10. Protect your eyes and ears while working with wood.

Tips on How to Rip a 2×6 With a Circular Saw:

-Use a sharp blade for cutting the wood.

-Make sure the saw is properly aligned before making the cuts.

-Use a speed square to ensure the cuts are straight.

-Apply wood glue to the edges of the wood before joining them together.

-Use a cordless drill to make holes in the wood.

-Apply a finish to the wood to protect it from moisture.

-Attach the wood to a surface using a staple gun.

-Wear safety goggles and ear protection while working with wood.

Safety Precautions to rip 2×6 with circular saw:

Most importantly, when working with any type of power tool, always take the necessary safety precautions. Read the manual that came with your saw and make sure you understand how to use it properly. Also, wear the appropriate safety gear, including eye and ear protection.

Now that you’re familiar with the basics of using a circular saw, let’s move on to ripping a 2×6.

  1. Start by setting your saw to the correct blade depth. For a 2×6, you’ll want to set the blade to about 1-1/2 inches deep.
  2. Next, clamp the 2×6 to your work surface. Make sure the board is firmly secured before starting to cut.
  3. Now it’s time to start cutting. Slowly guide the saw along the length of the board, keeping the blade at a consistent depth.
  4. When you reach the end of the board, stop the saw and unclamp the wood.
  5. You’ve now successfully ripped a 2×6!

With a little practice, you’ll be able to rip boards of all sizes with your circular saw.

FAQs:

Q: What’s the best way to rip a 2×6 with a circular saw?

A: The best way to rip a 2×6 with a circular saw is to set the blade depth to 1-1/2 inches, clamp the board to your work surface, and slowly guide the saw along the length of the board.

Q: What are the risks of ripping a 2×6 with a circular saw?

A: The main risk of ripping a 2×6 with a circular saw is that the blade can bind in the cut, causing the saw to kick back. To avoid this, be sure to set the blade depth correctly, use a sharp blade, and keep a firm grip on the saw.

Q: What are some tips for ripping a 2×6 with a circular saw?

A: Some tips for ripping a 2×6 with a circular saw include clamping the board to your work surface, using a sharp blade, and guiding the saw slowly and steadily along the length of the board. Additionally, it’s important to make sure that the blade is properly set to the correct depth before beginning the cut.

Conclusion:

While it is possible to rip a 2×6 with a circular saw, it is not recommended. Circular saws are not designed for this type of cutting and it can be very dangerous. If you must rip a 2×6, use a saw with a rip fence and be very careful. Always wear eye and ear protection and follow all safety guidelines.

Thanks for reading! I hope this article was helpful. If you have any questions or comments, please leave them below.

Happy woodworking!


Best Circular Saw Blade for Laminate Flooring

Best Circular Saw Blade for Laminate Flooring

Circular saw blades are an important part of any workshop, and there’s no blade more important than the one you use to cut laminate flooring. With the right blade, you can make precise, clean cuts that will look great and last for years. So, what’s the best circular saw blade for cutting laminate? In this post, we’ll take a look at some of the best options on the market and give you a few tips on how to choose the right one for your needs. Stay safe out there!

>>>> 

At a Glance:

  1. Makita A-93681
  2. Concord Blades
  3. BOSCH T503
  4. Freud D12100X
  5. BOSCH DCB1080
  6. Norske Tools Saw Blade

List of Best Circular Saw Blade for Laminate Flooring

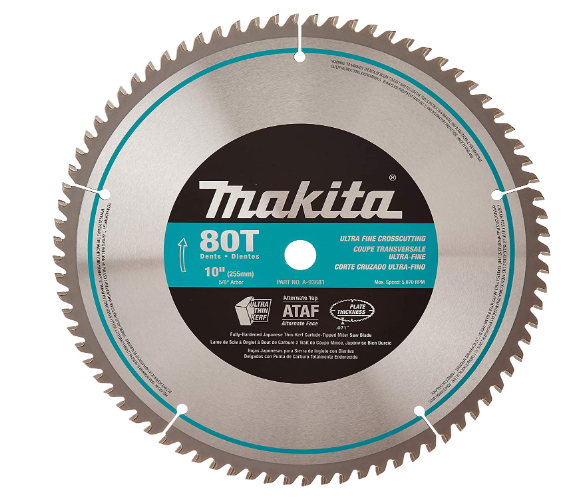
Makita A-93681

Makita A-93681

SPECIFICATIONS

Brand: ‎Makita| Item Weight: ‎‎1.75 Pounds| Style: ‎Miter Saw – Micro-Polished

REASONS TO BUY

The Makita A-93681 has been designed specifically for cutting laminate flooring.

The micro-grain carbide teeth are honed with up to 600 grit for a mirror finish.

The fully hardened and expertly hand-tensioned steel saw plates ensure true cuts.

With an ultra-thin kerf of .091″, a 5-degree hook angle, and a .071 plate thickness, this blade is ideal for fine crosscutting.

This product also features laser-cut stabilizer vents for precise, stable, and clean cuts.

Another good thing about this product is that it’s backed by Makita’s one-year warranty.

REASONS TO AVOID

Some drawbacks of this product include the fact that it only has 24 teeth, which means it’s not ideal for dense materials.

It also doesn’t come with a case.

Starting with our first product, the Makita A-93681, we have a blade that’s been designed specifically for cutting laminate flooring. This product is best for those who are looking for a clean, precise cut as it’s been made with a high degree of accuracy in mind.

Features

The micro-grain carbide teeth are honed with up to 600 grit for a mirror finish, and the fully hardened and expertly hand-tensioned steel saw plates ensure true cuts. With an ultra-thin kerf of .091″, a 5-degree hook angle, and a .071 plate thickness, this blade is ideal for fine crosscutting. This product also features laser-cut stabilizer vents for precise, stable, and clean cuts. Another good thing about this product is that it’s backed by Makita’s one-year warranty.

Drawback

Some drawbacks of this product include the fact that it only has 24 teeth, which means it’s not ideal for dense materials, and it also doesn’t come with a case.

Our Verdict

We highly recommend this product to anyone looking for a quality circular saw blade for cutting laminate flooring. It’s got everything you need for precise, clean cuts, and it’s backed by a reputable brand.

Concord Blades

Concord Blades

SPECIFICATIONS

Brand:  ‎Concord Blades| Item Weight: 0.35 Pounds| Style: ‎5-3/8-Inch 40 Teeth

REASONS TO BUY

Pro-quality, construction-grade steel blade

Precision sharp titanium carbide tips

Great for cutting laminate, solid wood, and engineered wood floors

Thin kerf design for a smooth finish with minimal waste

Lower hook angle improves the surface quality of the cut

REASONS TO AVOID

Only available in one size (10-inches)

Only compatible with 10-inch saws

Only designed for cutting laminate and wood floors

The next product on our list is the Concord Blades WCB1000T080HP 10-Inch 80 Tooth Titanium Carbide Tipped TCG Hard and Fast Material Cutting Saw Blade.

Features

This is a pro-quality, construction-grade steel blade that has been designed for use on miter saws, hand saws, and chop saws. It has a maximum RPM of 11,000, making it great for cutting through flooring materials such as laminates, solid wood, and engineered wood.

The blade’s thin kerf design allows for a smooth finish with minimal waste, while its lower hook angle improves the surface quality of the cut and increases the feed pressure required. Overall, this is an excellent choice for those looking for a high-quality and durable saw blade for their laminate flooring projects.

Drawback

The downside of this product is that it is only available in one size (10-inches), so you will need to make sure that it is compatible with your saw before purchasing. Additionally, the blade is only designed for cutting laminate and wood floors, so it may not be ideal for other materials such as tile or concrete.

Our Verdict

Overall, the Concord Blades WCB1000T080HP 10-Inch 80 Tooth Titanium Carbide Tipped TCG Hard and Fast Material Cutting Saw Blade is a great choice for those looking for a high-quality and durable saw blade for their laminate flooring projects. It is important to note that the blade is only compatible with 10-inch saws and is only designed for cutting laminate and wood floors.

BOSCH T503
 

BOSCH T503

SPECIFICATIONS

Brand: ‎BOSCH| Item Weight: ‎0.4 Pounds| Style: ‎Basic

REASONS TO BUY

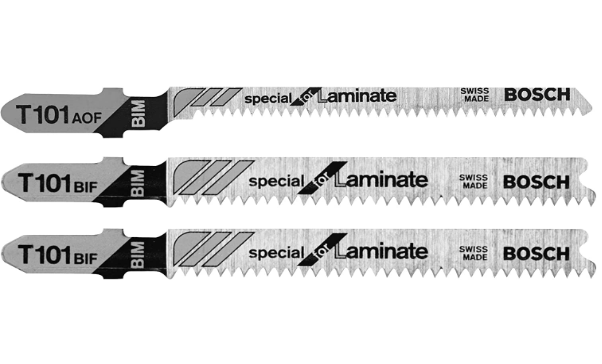
Two T101BF clean for hardwood

One T101AOF special for laminate

Bi-Metal construction for durability and long life

Optimized for straight and curved cuts

Great value for the money

REASONS TO AVOID

A bit more expensive than other products on the market

The next product on our list is the Bosch T503. It is a great product for anyone looking for a durable and high-performance option. The Bosch T503 is made of carbide, which is one of the most durable materials.

Features

This is a three-piece set that includes two blades for hardwood floors and one for laminate. The blades are made of bi-metal construction for durability and long life. They are also optimized for both straight and curved cuts. This set is a great option for those who need to cut both hardwood and laminate flooring.

What sets the Bosch T503 apart from other products on the market is its unique design. The blades are designed to cut through both hardwood and laminate flooring with ease. This makes it a great choice for those who need to cut through both types of materials.

If you are looking for a product that can help you cut through both hardwood and laminate flooring, then the Bosch T503 is a great option for you.

Drawback

One drawback of the Bosch T503 is that it is a bit more expensive than other products on the market. However, you are getting three blades for the price of one. This makes it a great value for the money.

Our Verdict

The Bosch T503 is a great choice for those who need to cut both hardwood and laminate flooring. The blades are made of bi-metal construction for durability and long life. Our team tested the blades on both hardwood and laminate flooring and found them to be very effective.

Freud D12100X

Freud D12100X

SPECIFICATIONS

Brand: Diablo| Item Weight: ‎2.5 Pounds| Style: ‎Circular

REASONS TO BUY

Shear-face grind design delivers effortless cuts

Reduced amp draw helps to maximize tool performance

Diamond Knockout Arbor protects your tools from kickback

Kickback Brake engages in under a second to reduce the risk of injury

Laser-cut stabilizer vents trap noise and vibration

REASONS TO AVOID

Not as durable as some other options on our list

Can be a bit pricey for some budgets

Our Next product on the list is the Freud D12100X. This is a great choice for anyone looking for a quality circular saw blade that can handle laminate floors.

Features

The shear-face grind design delivers effortless cuts with a reduced amp draw on tools for less material waste and to help maximize tool performance. The laser-cut stabilizer vents trap noise and vibration and stabilize the blade. The Freud D12100X is a great choice for anyone looking to get the most out of their circular saw.

This product also features a Diamond Knockout Arbor which is designed to protect your tools from kickback. The Kickback Brake engages when the blade encounters resistance, stopping the blade in under a second and reducing the risk of injury. The Freud D12100X is a great choice for anyone looking for a safe and reliable circular saw blade.

Drawback

One downside of this product is that it is not as durable as some of the other blades on our list. If you are looking for a blade that will last you a long time, you may want to consider one of the other options on our list.

Our Verdict

Overall this is a great product for anyone looking for a quality circular saw blade that can handle laminate floors. The shear-face grind design delivers effortless cuts with a reduced amp draw on tools for less material waste and to help maximize tool performance. We highly recommend this product to anyone in the market for a new circular saw blade.

BOSCH DCB1080

BOSCH DCB1080

SPECIFICATIONS

Brand:  BOSCH| Item Weight: 1.75 Pounds| Style: ‎80 Teeth

REASONS TO BUY

Top-quality blade

Fast and efficient

Accurate cuts

Resists bending and deflection

Extreme performance

REASONS TO AVOID

A little more expensive

Not as widely available

The next product on our list is the BOSCH DCB1080. The Bosch name is synonymous with quality, so it’s no surprise that their blade for laminate flooring is one of the best on the market.

Features

The C3/C4 micro grain formulation has been upgraded to Brute Carbide for increased impact damage resistance. The ATB tooth geometry is designed for fast cross-cutting, cutoff, and trim of wood and plywood. The speed coat is an anti-friction finish that allows for faster cutting with no burning or melting.

The thinner kerf provides faster cuts and less waste. The extra-hard steel blade body delivers accuracy and resists bending and deflection for true cuts. The edge blades are developed for extreme performance for specific materials and applications. Quality manufacturing features the best materials and innovative engineering.

Drawback

Some downsides of this product are that it is a little more expensive than some of the others on our list. Additionally, it is not as widely available as some of the other options.

Our Verdict

We recommend this product to anyone looking for a top-quality blade for their laminate flooring projects. Overall this is an excellent blade that will get the job done quickly and efficiently.

Norske Tools Saw Blade

Norske Tools Saw Blade

SPECIFICATIONS

Brand:  DEWALT| Item Weight: ‎3.6 Pounds| Style: Line Laser Kit Only

REASONS TO BUY

The blade is made of abrasion-resistant Polycrystalline diamond Carbide for faster cutting and increased cutting life.

The extra-large gullet design improves material removal and minimizes dust.

The laser-cut body, Anti-Vibration, and Expansion slots reduce noise and vibration during operation.

This product comes with a limited lifetime warranty.

REASONS TO AVOID

This product is not ideal for cutting softer materials such as wood or plastic.

The next product on our list is the Norske Tools Saw Blade. This product is designed for use with laminate floors.

Features

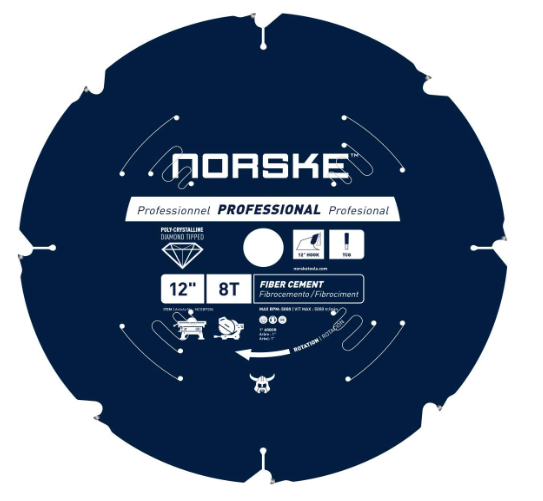
This blade is designed specifically for cutting HardiePlank, cemplank, and other fiber cement products. The blade features abrasion-resistant Polycrystalline diamond Carbide for faster cutting and increased cutting life. The extra-large gullet design improves material removal and minimizes dust.

The laser-cut body, Anti-Vibration, and Expansion slots reduce noise and vibration during operation. This product also features a 5/8” arbor with a Diamond Knockout. One good thing about this product is that it can be used on a variety of different saws such as circular, miter, table, and chop saws. Another great thing about this product is that it comes with a limited lifetime warranty.

Drawback

One downside of this product is that it is not ideal for cutting softer materials such as wood or plastic. Otherwise, this is a great product for those who are looking for a durable and long-lasting saw blade.

Our Verdict

This is a great product for those who are looking for a durable and long-lasting saw blade. The blade is made of abrasion-resistant Polycrystalline diamond Carbide for faster cutting and increased cutting life. The extra-large gullet design improves material removal and minimizes dust.

https://www.youtube.com/watch?v=x4skEcyEkxo

Buying Guide

When it comes to choosing the best circular saw blade for laminate flooring, there are a few things you need to keep in mind.

1. The type of saw blade

The type of saw blade you need will depend on the type of laminate flooring you have. There are two main types of laminate flooring: engineered and solid.

Engineered laminate flooring is made up of multiple layers of material, with a hardwood veneer on the top. This type of laminate flooring is more resistant to moisture and temperature changes, making it a good choice for rooms that see a lot of traffic or have high humidity levels.

Solid laminate flooring is made from a single piece of material, with no veneer on top. This type of laminate flooring is more affordable, but it is not as resistant to moisture and temperature changes.

2. The size of the blade

The size of the saw blade you need will depend on the thickness of your laminate flooring. Most laminate flooring is between 8 and 12mm thick, so you will need a saw blade that can handle that thickness.

3. The number of teeth on the blade

The number of teeth on the saw blade will determine how smooth the cut is. A blade with more teeth will give you a smoother cut, but it will also take longer to make the cut. A blade with fewer teeth will be quicker, but the cut may not be as smooth.

4. The material of the blade

The material of the saw blade is also important to consider. Saw blades are made from different types of materials, including carbide, high-speed steel, and stainless steel.

Carbide-tipped blades are the most expensive, but they stay sharp longer and can handle more difficult cuts.

High-speed steel blades are less expensive than carbide-tipped blades, but they dull more quickly.

Stainless steel blades are the least expensive option, but they are not as durable as the other two options.

5. The type of saw you have

The type of saw you have will also affect the type of saw blade you need. If you have a handheld circular saw, you will need a different blade than if you have a table saw.

Handheld circular saws can use either carbide-tipped or high-speed steel blades. Table saws require a different type of blade, called a rip blade, which has a different tooth configuration.

6. The Durability of the blade

You also need to consider the durability of the blade. Some blades are designed for one-time use, while others can be reused multiple times.

One-time use blades are typically made from high-speed steel or stainless steel. They are less expensive than carbide-tipped or rip blades, but they will need to be replaced more often.

7. The price

The price of the saw blade is also something to consider. Carbide-tipped blades are the most expensive, but they will last the longest. High-speed steel blades are less expensive, but they will need to be replaced more often. Stainless steel blades are the least expensive option, but they are not as durable as the other two options.

8. The warranty

When you are looking at saw blades, pay attention to the warranty. Some manufacturers offer a limited warranty, while others offer a lifetime warranty. A limited warranty will cover the blade for a certain amount of time, usually one year. A lifetime warranty will cover the blade for as long as you own it.

9. The return policy

Before you purchase a saw blade, make sure you know the return policy of the store or website you are buying from. Some stores will only accept returns if the blade is defective, while others will allow you to return the blade if it is not the right size or type for your needs.

10. The reviews

Finally, take the time to read reviews of the saw blade you are considering. Look for reviews from people who have used the blade on laminate flooring. Reading reviews will help you get an idea of how well the blade performs and how durable it is.

FAQs

Can you use a circular saw to cut laminate flooring?

Yes, you can use a circular saw to cut laminate flooring. However, you will need to use a blade that is specifically designed for laminate flooring. These blades are usually made of carbide or diamond and have a very fine tooth count.

What saw is best for cutting laminate flooring?

A circular saw is the best type of saw to use for cutting laminate flooring. This is because it can make very precise cuts and is easy to maneuver.

What is the best circular saw blade for laminate worktops?

The best circular saw blade for laminate worktops is one that is specifically designed for cutting laminate. These blades are usually made of carbide or diamond and have a very fine tooth count.

What circular saw blade Do I need to cut laminate?

You will need to use a blade that is specifically designed for laminate flooring. These blades are usually made of carbide or diamond and have a very fine tooth count.

How do professionals cut laminate flooring?

Most professionals use a circular saw to cut laminate flooring. This is because it can make very precise cuts and is easy to maneuver.

Are more teeth on a saw blade better?

More teeth on a saw blade can be better for making precision cuts. However, it is important to note that more teeth also mean that the blade will get dull faster.

Conclusion 

So, what is the best circular saw blade for laminate flooring? The answer may not be as straightforward as you think. It depends on your individual needs and preferences. However, we hope that this comprehensive buying guide has helped you make an informed decision about which blade is right for you. If you have any questions that weren’t answered in this article, feel free to leave a comment below. We’ll do our best to get back to you as soon as possible. Thanks for reading!

>>>

Can You Cut Granite With a Tile Saw?

As a building material, granite has many advantages: it’s strong, durable, and looks great. But what if you don’t have a big budget for your home renovation project? Can you still use granite? In this blog post, we’ll explore the options for cutting granite without breaking the bank. Stay tuned!

>>>> Do Laser Levels Work Outside?

Let’s get started!

Can You Cut Granite With a Tile Saw?

The short answer is: yes, you can cut granite with a tile saw. But there are a few things you need to keep in mind. First, granite is a lot harder than tile, so you’ll need to use a blade that’s designed for cutting hard materials. Second, granite is a lot heavier than tile, so you’ll need to make sure your saw is stable and can handle the weight. And finally, granite is a lot more brittle than tile, so you’ll need to be careful not to crack or chip the stone.

If you’re planning on cutting granite for your home renovation project, we recommend that you consult with a professional before getting started. They can help you choose the right saw and blade for the job, and they can also give you some tips on how to cut granite safely.

Granite Tile Properties

When it comes to tile properties, granite is on the harder side. This means that to cut it, you’ll need a saw with a blade that’s designed for cutting hard materials. The good news is that there are many types of saws on the market that can handle granite. The key is to find a stable one that can handle the weight of the granite.

>>> How to Use Laser Level for Floor?

Granite is also a lot more brittle than tile. This means that it’s more likely to crack or chip if it’s not cut properly. That’s why it’s important to consult with a professional before cutting granite for your home renovation project. They can help you choose the right saw and blade for the job, and they can also give you some tips on how to cut granite safely.

Wet Tile Saw For Cutting Granite

A wet tile saw is a type of saw that uses water to cool the blade and prevent the granite from overheating. This is important because overheating can cause the granite to crack or chip. Wet tile saws are available in a variety of sizes and can be used to cut granite slabs or tiles.

If you’re planning on cutting granite for your home renovation project, we recommend that you consult with a professional before getting started. They can help you choose the right saw and blade for the job, and they can also give you some tips on how to cut granite safely.

Right Blade To Use When Cutting Granite

The type of blade you use will depend on the type of saw you’re using. If you’re using a wet tile saw, you’ll need to use a blade that’s designed for cutting hard materials. There are many types of blades on the market that can handle granite. The key is to find a stable one that can handle the weight of the granite.

If you’re using a dry tile saw, you can use a standard blade. But keep in mind that dry tile saws are more likely to overheat the granite, which can cause it to crack or chip. So if you’re using a dry tile saw, we recommend that you consult with a professional before getting started.

They can help you choose the right saw and blade for the job, and they can also give you some tips on how to cut granite safely.

What Other Saws Can Cut Granite:

If you don’t have a wet tile saw, there are a few other types of saws that can be used to cut granite. These include:

-Circular saws: Circular saws can be used to cut granite, but they’re more likely to overheat the stone and cause it to crack or chip. So if you’re using a circular saw, we recommend that you consult with a professional before getting started.

-Angle grinders: Angle grinders are another option for cutting granite, but they can be difficult to control. So if you’re using an angle grinder, we recommend that you consult with a professional before getting started.

-Diamond blades: Diamond blades can be used to cut granite, but they’re more likely to overheat the stone and cause it to crack or chip. So if you’re using a diamond blade, we recommend that you consult with a professional before getting started.

Cutting granite can be a challenging task, but it’s doable with the right tools and a little bit of know-how. If you’re planning on cutting granite for your home renovation project, we recommend that you consult with a professional before getting started.

They can help you choose the right saw and blade for the job, and they can also give you some tips on how to cut granite safely.

FAQs

Q: Can I cut granite with a tile saw?

A: Yes, you can cut granite with a tile saw. But keep in mind that granite is a lot more brittle than tile. This means that it’s more likely to crack or chip if it’s not cut properly.

That’s why it’s important to consult with a professional before cutting granite for your home renovation project. They can help you choose the right saw and blade for the job, and they can also give you some tips on how to cut granite safely.

Q: What type of blade do I need to use?

A: The type of blade you’ll need to use depends on the type of saw you’re using. If you’re using a wet tile saw, you’ll need to use a blade that’s designed for cutting hard materials. There are many types of blades on the market that can handle granite. The key is to find a stable one that can handle the weight of the granite.

Conclusion

In conclusion, if you are looking to cut granite with a tile saw there are a few things that you will need to do to make the process go smoothly. Make sure that you have the right tools and follow our step-by-step guide for the best results.

If you have any questions about the process or would like some additional advice, please feel free to reach out to us. We are always happy to help!

>>>> How to Use Laser Level for Landscaping?

Can You Cut Pavers With a Tile Saw

Can You Cut Pavers With a Tile Saw

Paving stones, or pavers, are a great way to add some extra luxury and aesthetic appeal to your outdoor space. But what do you do if one of your pavers gets damaged?

>>>> How to Cut Ceramic Tile Without a Wet Saw?

You could try to patch it up with some mortar, but a better solution might be to just cut it out and replace it with a new paver. In this blog post, we’ll show you how to cut pavers with a tile saw. Read on for instructions!

Can You Cut Pavers With a Tile Saw

A tile saw is a great tool for cutting pavers. It can easily cut through the bricks and create clean, straight lines. However, there are a few things you need to keep in mind when using a tile saw to cut pavers.

First, always use a wet saw when cutting pavers. This will help to prevent the bricks from cracking or chipping.

Second, make sure that the blade you are using is designed for cutting pavers. Some tile saw blades are not meant for cutting hard materials like pavers and can quickly become dull.

>>>> Can You Cut Marble With a Tile Saw?

Third, take your time when cutting pavers. Pavers are a bit harder to cut than tile, so it is important to go slowly and be precise.

Overall, a tile saw is a great tool for cutting pavers. Just be sure to keep these tips in mind and you will be able to create clean, straight lines.

Step-by-step guide :

  1. Gather your materials.

The first step to cutting pavers with a tile saw is to gather your materials. You will need a wet saw, a paver blade, and some pavers.

  1. Install the paver blade.

Next, you will need to install the paver blade onto your wet saw. Make sure that the blade is installed correctly and that it is tight.

  1. Mark your cutting line.

After the blade is installed, you will need to mark your cutting line on the pavers. Use a pencil or a chalk line to create a straight line.

  1. Cut the pavers.

Once you have marked your cutting line, you can begin to cut the pavers. Slowly guide the wet saw along the line and let the blade do the work.

  1. Clean up the edges.

After you have cut the pavers, you will need to clean up the edges. Use a chisel or a hammer to knock off any rough edges.

Cutting pavers with a tile saw is a great way to create clean, straight lines. Just be sure to use a wet saw, install the paver blade correctly, and take your time. With these tips, you will be able to cut pavers like a pro!

Precautions :

When cutting pavers with a tile saw, there are a few precautions you need to take. First, always wear eye protection. The blades on a tile saw can be very sharp and can easily cause injury.

Second, always use a wet saw when cutting pavers. This will help to prevent the bricks from cracking or chipping.

Third, make sure that the blade you are using is designed for cutting pavers. Some tile saw blades are not meant for cutting hard materials like pavers and can quickly become dull.

Fourth, take your time when cutting pavers. Pavers are a bit harder to cut than tile, so it is important to go slowly and be precise.

By following these precautions, you can safely cut pavers with a tile saw. Just be sure to take your time and be careful and you will be able to create clean, straight lines.

FAQs

What size does tile saw to cut pavers?

The size of the tile saw doesn’t matter as long as the blade is big enough to cut through the pavers.

Can I use a regular blade to cut pavers?

No, you need to use a paver blade to cut through the pavers. Regular blades are not meant for cutting hard materials and can quickly become dull.

What kind of saw do you use to cut pavers?

A wet saw is the best type of saw to use when cutting pavers. The water will help to prevent the pavers from cracking or chipping.

How do I keep my pavers from cracking?

When cutting pavers, always use a wet saw. The water will help to prevent the pavers from cracking or chipping. Also, make sure that the blade you are using is designed for cutting pavers. Some tile saw blades are not meant for cutting hard materials and can quickly become dull.

What is the easiest way to cut pavers?

The easiest way to cut pavers is with a wet saw. The water will help to prevent the pavers from cracking or chipping. Also, make sure that the blade you are using is designed for cutting pavers. Some tile saw blades are not meant for cutting hard materials and can quickly become dull.

Can I cut bricks with a tile saw?

No, you should not cut bricks with a tile saw. Bricks are much harder than pavers and can quickly damage the blade on your saw. If you need to cut bricks, you should use a brick saw.

What do you use to cut concrete pavers?

A wet saw is the best type of saw to use when cutting concrete pavers. The water will help to prevent the pavers from cracking or chipping. Also, make sure that the blade you are using is designed for cutting concrete pavers. Some tile saw blades are not meant for cutting hard materials and can quickly become dull.

Conclusion

In conclusion, using a tile saw to cut pavers is a cost-effective and efficient way to achieve the desired results. However, there are some things that you should keep in mind before getting started.

By following the step-by-step guide and answering some of the most frequently asked questions, you can be sure that your project goes as smoothly as possible. Have fun and happy cutting!

>>>> How To Use A Tile Saw?

Angle Grinder Vs Circular Saw?

Angle Grinder Vs Circular Saw?

Angle grinders and circular saws are both powerful tools that are used to cut through metal, wood, and other materials. They have many similarities, but there are also some key differences between them. In this post, we’ll take a look at the pros and cons of each tool, so you can decide which is right for you.

>>>> How to Rip a 2×6 With a Circular Saw

 What is Angle Grinder?

An angle grinder is a handheld power tool that can be used for a variety of different applications. The most common use for an angle grinder is grinding down metal or concrete, but they can also be used for cutting tile, brick, and stone. Angle grinders typically have either a 4-inch or 5-inch diameter disc, and they can operate at either a high speed or low speed. The higher the speed, the more power the angle grinder has. Angle grinders are available with either a corded or cordless design.

Angle grinders are one of the most versatile tools in a homeowner’s or contractor’s toolbox. They can be used for a variety of different applications, such as grinding down metal or concrete, cutting tile, brick, stone, and more. Angle grinders typically have either a 4-inch or 5-inch diameter disc, and they can operate at either a high speed or low speed. The higher the speed, the more power the angle grinder has. Angle grinders are available with either a corded or cordless design.

What is Circular Saw?

A circular saw is a handheld power tool that can be used for a variety of different applications. The most common use for a circular saw is cutting wood, but it can also be used for cutting metal, tile, brick, and stone. Circular saws typically have either a 4-inch or 6-inch diameter blade, and they can operate at either a high speed or low speed. The higher the speed, the more power the circular saw has. Circular saws are available with either a corded or cordless design.

Circular saws are one of the most versatile tools in a homeowner’s or contractor’s toolbox. They can be used for a variety of different applications, such as cutting wood, metal, tile, brick, and stone. Circular saws typically have either a 4-inch or 6-inch diameter blade, and they can operate at either a high speed or low speed. The higher the speed, the more power the circular saw has. Circular saws are available with either a corded or cordless design.

Pros of Angle grinder :

-Can be used for a variety of purposes such as grinding, cutting, and polishing

-Angle grinders are typically cheaper than other types of power saws

-Angle grinders are smaller and more maneuverable than other types of power saws, making them easier to use

Cons of Angle grinder:

-If not used properly, angle grinders can be very dangerous

-Angle grinders can create a lot of dust and noise

Pros of Circular Saws:

-Circular saws can make straight cuts easily

-Circular saws can cut through thicker materials than angle grinders

-Circular saws are typically more expensive than angle grinders

Cons of Circular Saws:

-Circular saws can be dangerous if not used properly

-Circular saws can create a lot of dust and noise

FAQs

Can you use an angle grinder like a circular saw?

No, an angle grinder is not the same as a circular saw. Circular saws are designed to make straight cuts, while angle grinders are designed for grinding and cutting metal or concrete.

What is the difference between a corded and cordless angle grinder?

A corded angle grinder gets its power from an electrical outlet, while a cordless angle grinder gets its power from a battery. Corded angle grinders are more powerful than cordless ones, but they can be difficult to maneuver since you have to worry about the cord getting in the way. Cordless angle grinders are more expensive than corded ones, but they are much more maneuverable.

What’s the difference between an angle grinder and a circular saw?

An angle grinder is a handheld power tool that can be used for grinding, cutting, and polishing. A circular saw is a handheld power tool that can be used for cutting wood, metal, tile, brick, and stone. Angle grinders typically have either a 4-inch or 5-inch diameter disc, while circular saws typically have either a 4-inch or 6-inch diameter blade.

Conclusion paragraph:

So, which is the better tool for your project? The answer depends on what you’re trying to do. Angle grinders are great for smaller projects and tight spaces, while circular saws can handle larger jobs that require more power. Ultimately, it comes down to personal preference and the specific needs of your project. Have you used an angle grinder or a circular saw for a DIY project before? Let us know about your experience in the comments!

>>>> how to use sawhorse with circular saw

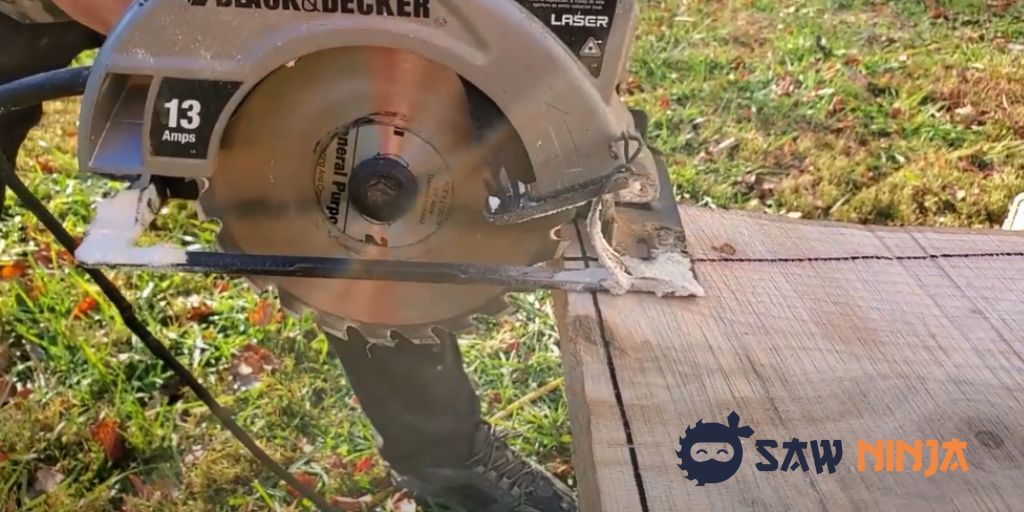
What is a 13 Amp Circular Saw

13 Amp Vs 15 Amp Circular Saw

There are a lot of factors to consider when you’re purchasing a circular saw. One of the most important is deciding whether you need a 13 amp or 15 amp model. This article will help you decide which one is right for you.

**** What is Circular Saw?

What is a 13 Amp Circular Saw?

A 13 amp circular saw is a powerful tool that can handle most projects. It’s great for both home and professional use. However, it’s important to note that a 13 amp saw will not be able to handle the same workload as a 15 amp saw. If you’re looking for a saw that can handle heavy-duty projects, then you’ll need to purchase a 15 amp model. Otherwise, a 13 amp saw will be more than sufficient for most projects.

There are many different brands and models of 13 amp circular saws on the market, so it’s important to do your research before purchasing one. You’ll want to consider the features that are important to you and compare prices. Once you’ve found the perfect model for your needs, you’ll be able to tackle any project with ease.

What is a 15 Amp Circular Saw?

A 15 amp circular saw is the most powerful option on the market. It’s designed for heavy-duty projects and can handle anything you throw at it. However, it’s important to note that a 15 amp saw will be more expensive than a 13 amp model. If you don’t need the extra power, then you’ll be better off purchasing a lower-priced saw.

**** How to remove the circular saw blade

When it comes to choosing a 15 amp saw, you’ll have plenty of options to choose from. There are many different brands and models on the market, so it’s important to do your research before making a purchase. You’ll want to consider the features that are important to you and compare prices. Once you’ve found the perfect model for your needs, you’ll be able to tackle any project with ease.

Pros of 13 Amp Circular Saws

– More affordable than 15 amp models

– Still powerful enough for most projects

– Plenty of different brands and models to choose from

Cons of 13 Amp Circular Saws

– Not as powerful as 15 amp models

– Can’t handle heavy-duty projects

Pros of 15 Amp Circular Saws

– Most powerful option on the market

– Can handle any project you throw at it

– Many different brands and models to choose from

Cons of 15 Amp Circular Saws

– More expensive than 13 amp models

– Can be too powerful for some projects

Which is better?

There is no easy answer when it comes to choosing between a 13 amp and 15 amp circular saw. It really depends on your needs and budget. If you’re looking for a powerful saw that can handle any project, then you’ll need to purchase a 15 amp model. However, if you don’t need the extra power, then you’ll be better off purchasing a 13 amp saw. Either way, you’ll be able to find a saw that’s perfect for your needs.

FAQs

How many amps should my circular saw be?

This really depends on the projects you’ll be using it for. If you’re only going to be doing light-duty projects, then a 10 amp saw will be sufficient. However, if you’re looking for a saw that can handle heavy-duty projects, then you’ll need to purchase a 15 amp model. Otherwise, a 13 amp saw will be more than sufficient for most projects.

Can I use a 13 amp saw for heavy-duty projects?

A 13 amp saw can handle most projects, but it’s not powerful enough for heavy-duty projects. If you’re looking for a saw that can handle the heaviest jobs, then you’ll need to purchase a 15 amp model. Otherwise, a 13 amp saw will be more than sufficient for most projects.

Is a 15 amp saw worth the extra money?

This really depends on your needs. If you’re looking for a powerful saw that can handle any project, then you’ll need to purchase a 15 amp model. However, if you don’t need the extra power, then you’ll be better off purchasing a 13 amp saw. Either way, you’ll be able to find a saw that’s perfect for your needs.

What should I look for when buying a circular saw?

There are many different things to consider when purchasing a circular saw. You’ll want to consider the power, blade size, and features that are important to you. Once you’ve considered all of these factors, you’ll be able to find the perfect model for your needs.

How powerful is a 15-amp motor?

A 15-amp motor is the most powerful option on the market. It’s designed for heavy-duty projects and can handle anything you throw at it. However, it’s important to note that a 15 amp saw will be more expensive than a 13 amp model. If you don’t need the extra power, then you’ll be better off purchasing a lower-priced saw.

Do I need a laser guide on my circular saw?

This is really a matter of personal preference. Some people find that a laser guide helps them make more accurate cuts, while others find it unnecessary. If you think you might benefit from a laser guide, then you should purchase a model that includes one. Otherwise, you can find models that don’t have a laser guide for a lower price.

Conclusion

Purchasing a 13 amp or 15 amp circular saw is a big decision. There are many different things to consider, such as price, power, and features. However, if you take the time to consider your needs, you’ll be able to find the perfect model for your next project. We have explained some key points about these two types of circular saws to help you make your decision. Now that you know more about them, you’ll be able to find the perfect model for your needs.

How Do Rotary Laser Levels Work

How Do Rotary Laser Levels Work?

Rotary laser levels are used to create perfectly horizontal or vertical lines. They are perfect for creating level lines for construction projects, as well as other tasks that require a straight line. How do these devices work, and what are the benefits of using them? This post will answer those questions and more. Stay tuned!

>>>> Best Laser Level for Cabinets

How Do Rotary Laser Levels Work?

What are rotary laser levels?

A rotary laser level is a tool that projects a laser beam in a 360-degree horizontal plane. It is used to create level lines for various construction and home improvement projects. The beam can be used as a reference point for leveling floors, setting foundations, installing cabinets, and more.

Working on Rotary Laser Level

A rotary laser level is a tool that projects a horizontal or vertical plane of laser light. It is used to establish level or plumb lines. These laser levels can be used to set grades for excavation, align posts or poles, level forms for pouring concrete footings or walls, and set the elevation of sprinkler heads.

Types of rotary laser level

There are two types of rotary laser levels:

  1. Horizontal only
  2. Horizontal and vertical

Horizontal-only

Horizontal-only rotary laser levels can only project a horizontal plane of light, while horizontal and vertical rotary laser levels can project both a horizontal and a vertical plane of light.

Horizontal and vertical

Some rotary laser levels can also project a vertical plane of light. This is useful for tasks such as aligning posts or poles or setting the elevation of sprinkler heads.

>>>> How to Use Laser Level for Drainage?

Precautions while using a rotary laser level

When using a rotary laser level, there are a few things to keep in mind:

  1. Always use the level in an area with good visibility.
  2. Be aware of your surroundings and avoid shining the laser beam into someone’s eyes.
  3. Use caution when working near power lines or other electrical hazards.
  4. Make sure the level is securely mounted before turning it on.
  5. Follow the manufacturer’s instructions for the proper use and care of the level.

Benefits of using a rotary laser level

There are many benefits to using a rotary laser level, including:

  1. Increased accuracy – Rotary laser levels are more accurate than traditional leveling methods, such as using a level or a plumb bob.
  2. Increased productivity – Rotary laser levels can save you time and increase your productivity.
  3. Versatility – Rotary laser levels can be used for a variety of tasks, such as leveling floors, setting foundations, installing cabinets, and more.
  4. Reduced eye strain – Unlike traditional leveling methods, rotary laser levels do not require you to constantly look down at a level or plumb bob. This can reduce eye strain and fatigue.
  5. Safety – Rotary laser levels can help you avoid potential accidents, such as tripping over a level or plumb bob.

FAQs

How accurate is a rotary laser level?

Rotary laser levels are very accurate. They can be used to create level lines that are within 1/16 of an inch (1.6mm).

What is the advantage of a rotary laser?

There are many advantages to using a rotary laser level, including increased accuracy, productivity, versatility, and safety.

How do you use a rotary laser level for drainage?

To use a rotary laser level for drainage, you will need to mount the level on a tripod and set it up in the area where you will be working. Once the level is set up, you will need to calibrate it according to the manufacturer’s instructions. After the level is calibrated, you can use it to create a level line that can be used as a reference point for drainage work.

How do you use a rotary laser level and staff?

To use a rotary laser level and staff, you will need to mount the level on a tripod and set it up in the area where you will be working. Once the level is set up, you will need to calibrate it according to the manufacturer’s instructions. After the level is calibrated, you can use it to create a level line that can be used as a reference point for the staff.

What can you use a rotary laser for?

Rotary lasers can be used for a variety of tasks, such as leveling floors, setting foundations, installing cabinets, and more.

How do you clean a rotary laser level?

To clean a rotary laser level, you will need to unplug the level and remove the batteries. Once the level is unplugged and the batteries are removed, you can use a soft cloth to wipe down the exterior of the level. If the level is very dirty, you can use a mild soap and water solution to clean it. After cleaning the level, make sure it is dry before storing it.

Conclusion

Rotary laser levels are essential pieces of equipment for many constructions and home improvement projects. This step-by-step guide will show you how rotary lasers work, as well as answer some common questions people have about them. Once you understand how these tools work, you’ll be able to use them with confidence on your next project. Thanks for following along!

>>>> How to Use Laser Level for Framing?

Will a Tile Saw Cut Granite

Will a Tile Saw Cut Granite?

If you’re looking to cut granite, you may be wondering if a tile saw will do the trick. The answer is yes – a tile saw can cut through granite, but there are a few things you need to keep in mind.

>>>> How to Change Blade on Ridgid Tile Saw?

In this blog post, we’ll take a look at how to cut granite using a tile saw, as well as some of the benefits and drawbacks of this approach. Stay tuned for tips on how to get the best results when cutting granite with a tile saw!

Will a Tile Saw Cut Granite?

If you’re looking to do some tile work that involves granite, you may be wondering if a tile saw is a right tool for the job. The answer is, that it depends.

Tile saws are designed to cut through ceramic and porcelain tile, which are much softer materials than granite. So, if you’re trying to cut through granite tile with a standard tile saw, you may have some difficulty.

However, there are tile saws specifically designed to cut through tougher materials like granite. These saws have diamond blades that can handle the hardness of granite.

So, if you’re looking to do some tile work that involves granite, you may want to invest in a tile saw that is specifically designed to cut through this tougher material.

Step-by-step guide on how to cut granite with a tile saw

Here is a step-by-step guide on how to cut granite with a tile saw:

1 Right tool

The first thing is to make sure you have the right tools for the job. As we mentioned, you’ll need a tile saw with a diamond blade that is specifically designed to cut through granite. You’ll also need a wet saw to keep the granite cool while you’re cutting it.

 2 Set up your work area

Next, you’ll need to set up your work area. Make sure you have a sturdy table or workbench to work on. You’ll also need to make sure you have enough light so you can see what you’re doing.

3 Measure and mark your granite tile

Measure and mark your granite tile before you start cutting. This will help you to make sure you’re making the cuts in the right place.

4 Set up your tile saw

Set up your tile saw according to the manufacturer’s instructions. Make sure the blade is sharp and that the saw is secured firmly to the table or workbench.

5 Wet your granite tile

Before you start cutting, wet your granite tile with a sponge or cloth. This will help to keep it cool while you’re cutting.

6 Start cutting

Slowly and carefully start cutting your granite tile along the line you marked. go slowly at first until you get a feel for how the saw is cutting through the granite.

7 Cut all the way through

Once you’ve cut through the top layer of the granite tile, you can increase the speed of the saw and finish cutting all the way through.

8 Clean up your work area

When you’re finished cutting, clean up your work area and dispose of any granite dust or shards.

 TIPS FOR CUTTING GRANITE WITH A TILE SAW

– Go slowly at first until you get a feel for how the saw is cutting through the granite.

– Wet the granite tile before you start cutting to help keep it cool.

– Use a guide or straight edge to help you make straight cuts.

– dispose of any granite dust or shards when you’re finished cutting.

Precautions to take when cutting granite with a tile saw

As with any project that involves power tools, there are some precautions you should take when cutting granite with a tile saw:

– Wear eye protection when using the saw.

– Wear gloves to protect your hands from the granite dust.

– Make sure the saw is unplugged when you’re not using it.

– Keep small children and pets away from the work area.

 FAQs

What kind of saw do you need to cut granite?

You’ll need a tile saw with a diamond blade that is specifically designed to cut through granite.

What is the best blade to cut granite?

When it comes to cutting granite, there are a few different blade options that you can choose from. The most common type of blade that is used for cutting granite is a diamond blade. Diamond blades can cut through granite with ease and are very durable. Another type of blade that can be used to cut granite is a carbide-tipped blade. Carbide-tipped blades are not as common as diamond blades, but they can cut through granite with ease as well.

Can I cut granite myself?

If you have the right tools and equipment, then cutting granite yourself is possible. However, it is important to keep in mind that granite is a very hard material to cut. This means that if you are not experienced in cutting granite, it is very easy to make mistakes that can ruin your project. It is always best to consult with a professional before attempting to cut granite yourself.

What is the easiest way to cut granite?

The easiest way to cut granite is with a power saw. Power saws can make clean and precise cuts through granite. If you do not have a power saw, then you can also use a hand saw. Although cutting granite with a hand saw is possible, it is very difficult to get a clean and precise cut. This is why it is always best to use a power saw if you can.

Conclusion

A tile saw can be a great investment for your home improvement projects, especially if you’re looking to tackle tasks like cutting granite. In this post, we’ve outlined everything you need to know before making your purchase, as well as a step-by-step guide on how to use your new saw.

We hope this information helps make your next project a success! Have any questions that weren’t answered in the post? Let us know in the comments and we’ll do our best to help out.

>>>> How to Cut Ceramic Tile Without a Wet Saw?

Can You See Green Laser Level in Daylight

Can You See Green Laser Level in Daylight?

I bet when you think of lasers, the image that comes to mind is a wicked-looking red beam. But what about green laser levels? Can you see them in daylight? Surprisingly, the answer is yes! In this blog post, we’ll take a closer look at green laser levels and how they compare to other types of lasers. Plus, we’ll give you some tips on choosing the right level for your needs. So keep reading to learn more!

>>> What is a Cross Line Laser Level?

Can You See Green Laser Level in Daylight?

As you probably know, laser levels come in different colors. The most common colors are red and green. So, which one is better?

Well, it depends on what you need it for. If you need it for general purpose leveling, then either color will work just fine.

However, if you need it for specific applications where visibility is important, then green is the way to go.

Green lasers are more visible in daylight than red lasers. This is because the human eye is more sensitive to green light than red light.

So, if you need a laser level for outdoor use or use in bright conditions, then a green laser level is the way to go.

Of course, green laser levels are more expensive than red laser levels. But if you need the extra visibility, then it is worth the investment.

Why Green is better?

The human eye is most sensitive to green light, so a green laser level is easier to see in daylight than a red one. Green is also the color of nature, so it’s more relaxing on the eyes. Another thing to consider is that some red lasers can appear pinkish, making them more difficult to see.

If you’ll be using your laser level outdoors, we recommend getting a green one. If you’ll be using it indoors mostly, either color will work fine.

>>>> How to Use Laser Level for Grading

One other advantage of green laser levels is that they tend to be a bit more expensive than red.

Disadvantages of Green Laser Level

While green laser levels have many advantages, there are a couple of disadvantages to consider as well. First, green laser levels can be more difficult to find than red. Second, they may not be as visible in bright sunlight as you would like.

Precautions while using a green laser level

Like any laser, you should take precautions while using a green laser level. Don’t shine the laser in anyone’s eyes, as this can cause permanent damage. Also, be careful not to shine the laser at reflective surfaces, as this can reflect the light into your eyes.

FAQs

Can you see a green laser in daylight?

Yes, you can see the green laser in daylight. The human eye is most sensitive to green light, so a green laser level is easier to see in daylight than a red one.

What color laser is best for daytime?

There are a few different colors of lasers that can be used for leveling during the day. While green is the most common color, other colors such as red and blue can also be used. The main factor to consider when choosing a color is how visible it will be in the daytime.

Does the laser sensor work in sunlight?

Laser sensors can be used in sunlight, but they may not be as accurate as when used in darker conditions. The sun’s rays can cause the sensor to produce a false reading, so it is important to test the sensor in various lighting conditions before using it for leveling.

How do you make a green laser more visible?

There are a few different ways to make a green laser more visible. One way is to use a higher-power laser. Another way is to use a lens that focuses the light into a narrower beam. Finally, using a green filter can help to increase the visibility of the laser.

Can you see a laser beam?

Yes, you can see a laser beam if it is shining on a surface that reflects light well. The beam will appear as a thin line of light. If the beam is shining on a surface that does not reflect light well, it will be much more difficult to see.

Do you need smoke to see lasers?

No, you don’t need to smoke to see lasers. You can see green laser levels in daylight. There are a few things to keep in mind, however. First, the laser level itself needs to be powerful enough to be visible in daylight.

Second, the beam needs to be strong enough to be visible in daylight. And third, the area around the laser level needs to be clear of any objects that could block the beam.

Conclusion

So, the answer to the question is yes – you can see a green laser level in daylight. However, depending on how bright the sun is and what color your surroundings are, it may be harder to see than if it were darker outside. If you’re having trouble seeing your green laser level during the day, try using it in a shaded area or wait until later in the evening when there’s less sunlight.

>>> Best Laser Level for Cabinets